

After months of contemplating, I finally went ahead and got myself the Nexus 5 and I'm really glad I got it. I love using this phone. But I'm not here to review the phone. I'll just be sharing some of the accessories I have bought and looking into buying :D for the phone.
First off the case, I'm using a Caseology Slim Fit TPU case pictured below. I can say that I really like this case. Ports are easily accessible and the phone is well protected. NFC and wireless charging still works even if the phone is in the case.
")
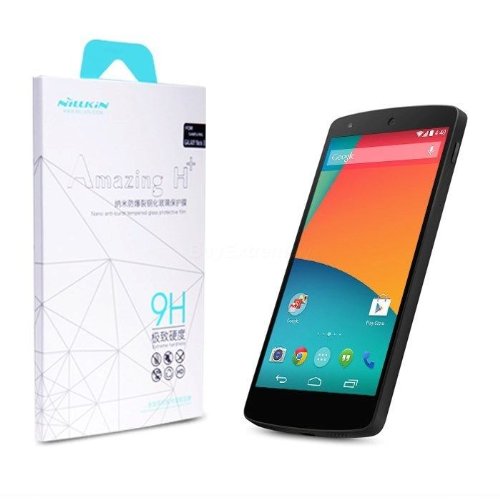
For the screen protector, I decided to try out the Nillkin 9H Tempered Glass screen protector. I must say that I will not go back to those plastic screen protectors. Tempered glass is the way to go. I love the feel of the screen protector on the phone. It's like I'm using it naked (well it's glass after all ;p). It attracts minimal fingerprints and it's easier to clean than those plastic screen protectors. It also comes with a (plastic) protector for the camera lens. The screen protector also works well with my Caseology case.
Here are a couple of other tempered glass screen protectors to choose from meOne and eBay Generic Tempered Glass
The Nexus 5 has a built-in wireless charging capability. You can use just about any Qi standard wireless charger with the phone. Below are some of the chargers that works with the Nexus 5:
Nillkin Wireless Qi Power Charger Charging Pad (manage to test this in a shop and it charges thru my case :D)
Nokia DT-900 Wireless Charging Plate (also tested this one in a shop and it also works)
or if you want a portable wireless external battery pack
[2-in-1] RAVPower® Qi-Enabled Wireless Charger / 4800mAh External Battery Pack Charger
You can also find some generic ones on eBay.
Since the Nexus 5 doesn't have a microSD card, we can make use of various USB OTG device to extend the storage capacity of the phone (pls note you have to install programs like [root] StickMount or Nexus USB OTG File Manager [non-root] to access USB OTG for flashdrives)
Meenova - Mini MicroSD Card Reader for Android
ADATA USA DashDrive Durable UD320 USB Flash Drive OTG
Leef Bridge 2.0 32GB Multi-Use USB Flash Drive (Black) for Android, Phones, Tablets, Mac, and Windows PC
First off the case, I'm using a Caseology Slim Fit TPU case pictured below. I can say that I really like this case. Ports are easily accessible and the phone is well protected. NFC and wireless charging still works even if the phone is in the case.
For the screen protector, I decided to try out the Nillkin 9H Tempered Glass screen protector. I must say that I will not go back to those plastic screen protectors. Tempered glass is the way to go. I love the feel of the screen protector on the phone. It's like I'm using it naked (well it's glass after all ;p). It attracts minimal fingerprints and it's easier to clean than those plastic screen protectors. It also comes with a (plastic) protector for the camera lens. The screen protector also works well with my Caseology case.
Here are a couple of other tempered glass screen protectors to choose from meOne and eBay Generic Tempered Glass
The Nexus 5 has a built-in wireless charging capability. You can use just about any Qi standard wireless charger with the phone. Below are some of the chargers that works with the Nexus 5:
Nillkin Wireless Qi Power Charger Charging Pad (manage to test this in a shop and it charges thru my case :D)
Nokia DT-900 Wireless Charging Plate (also tested this one in a shop and it also works)
or if you want a portable wireless external battery pack
[2-in-1] RAVPower® Qi-Enabled Wireless Charger / 4800mAh External Battery Pack Charger
You can also find some generic ones on eBay.
Since the Nexus 5 doesn't have a microSD card, we can make use of various USB OTG device to extend the storage capacity of the phone (pls note you have to install programs like [root] StickMount or Nexus USB OTG File Manager [non-root] to access USB OTG for flashdrives)
Meenova - Mini MicroSD Card Reader for Android
ADATA USA DashDrive Durable UD320 USB Flash Drive OTG
Leef Bridge 2.0 32GB Multi-Use USB Flash Drive (Black) for Android, Phones, Tablets, Mac, and Windows PC


